VPS first login: password change and basic setup (Windows / Linux)
VPS first login: password change and basic setup (Windows / Linux)
This guide explains the required / strongly recommended steps to complete after your first login to the VPS to keep it secure and stable.
For first access (RDP / SSH / SSH key), see: Connect to a server (Windows RDP and Linux SSH)
Recommendation: Use VPN only for RDP and SSH (WireGuard)
It is strongly recommended that whenever possible:
- RDP (Windows) and SSH (Linux) traffic goes through a WireGuard VPN,
- and ports 3389/22 are not exposed to the public internet.
WireGuard guide:
- https://vipy.hu/en/article/windows-rdp-wireguard
Windows VPS – password change and basic setup
1. Change password (Administrator) – from Settings
1. Open: Settings
- Start menu → Settings
2. Go to: Accounts
3. Select: Sign-in options
4. Under Password, click:
- Change
5. Enter:
- Current password
- New password
- Confirm new password
6. Save / finish:
- Next → Finish (button names may vary depending on the Windows version)
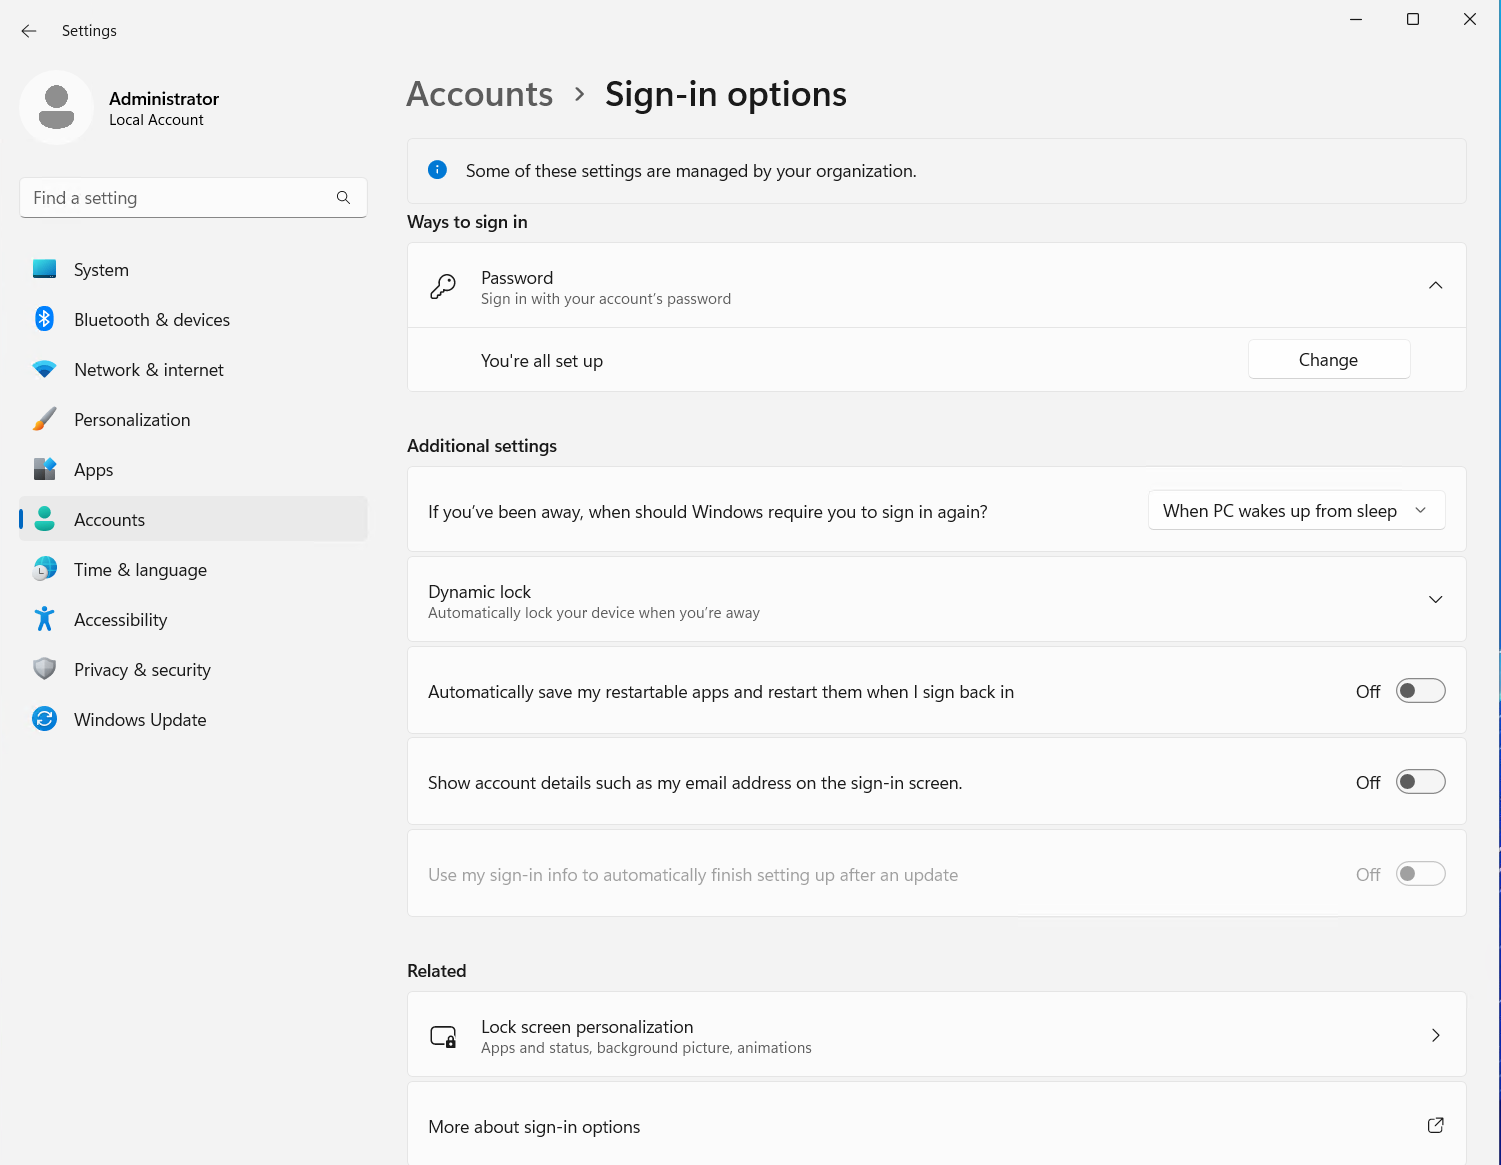
This is where you can find Password → Change.
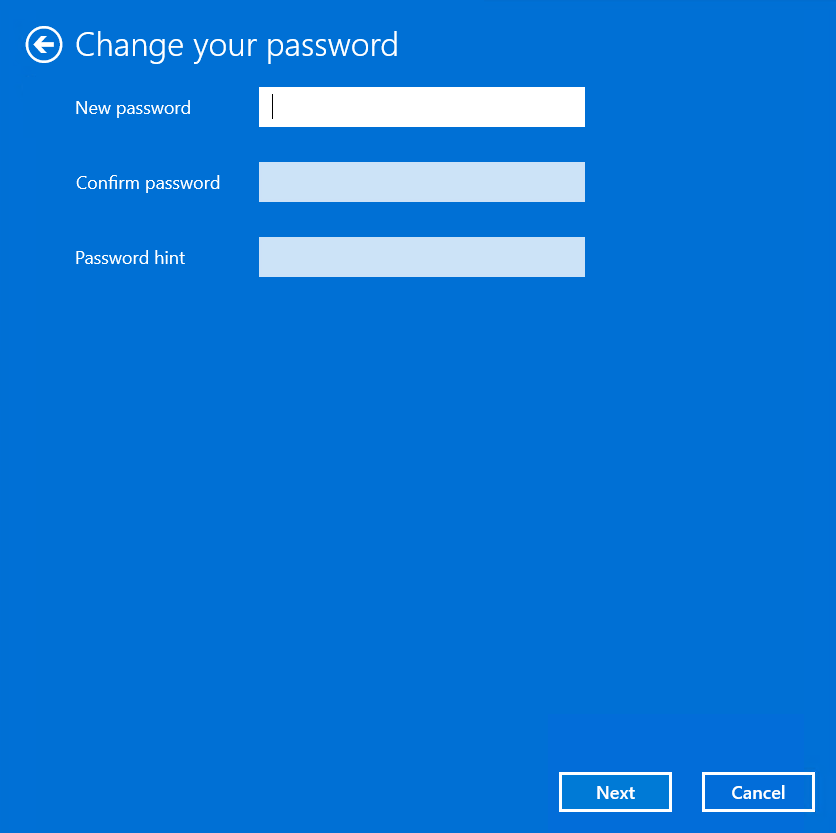
Enter and confirm your new password.
ℹ️ Recommended test: close your RDP session and reconnect using the new password.
2. Run Windows Update
1. Open: Settings
2. Go to: Windows Update
3. Click:
- Check for updates
4. Install updates:
- Download & install
5. If prompted, restart:
- Restart now
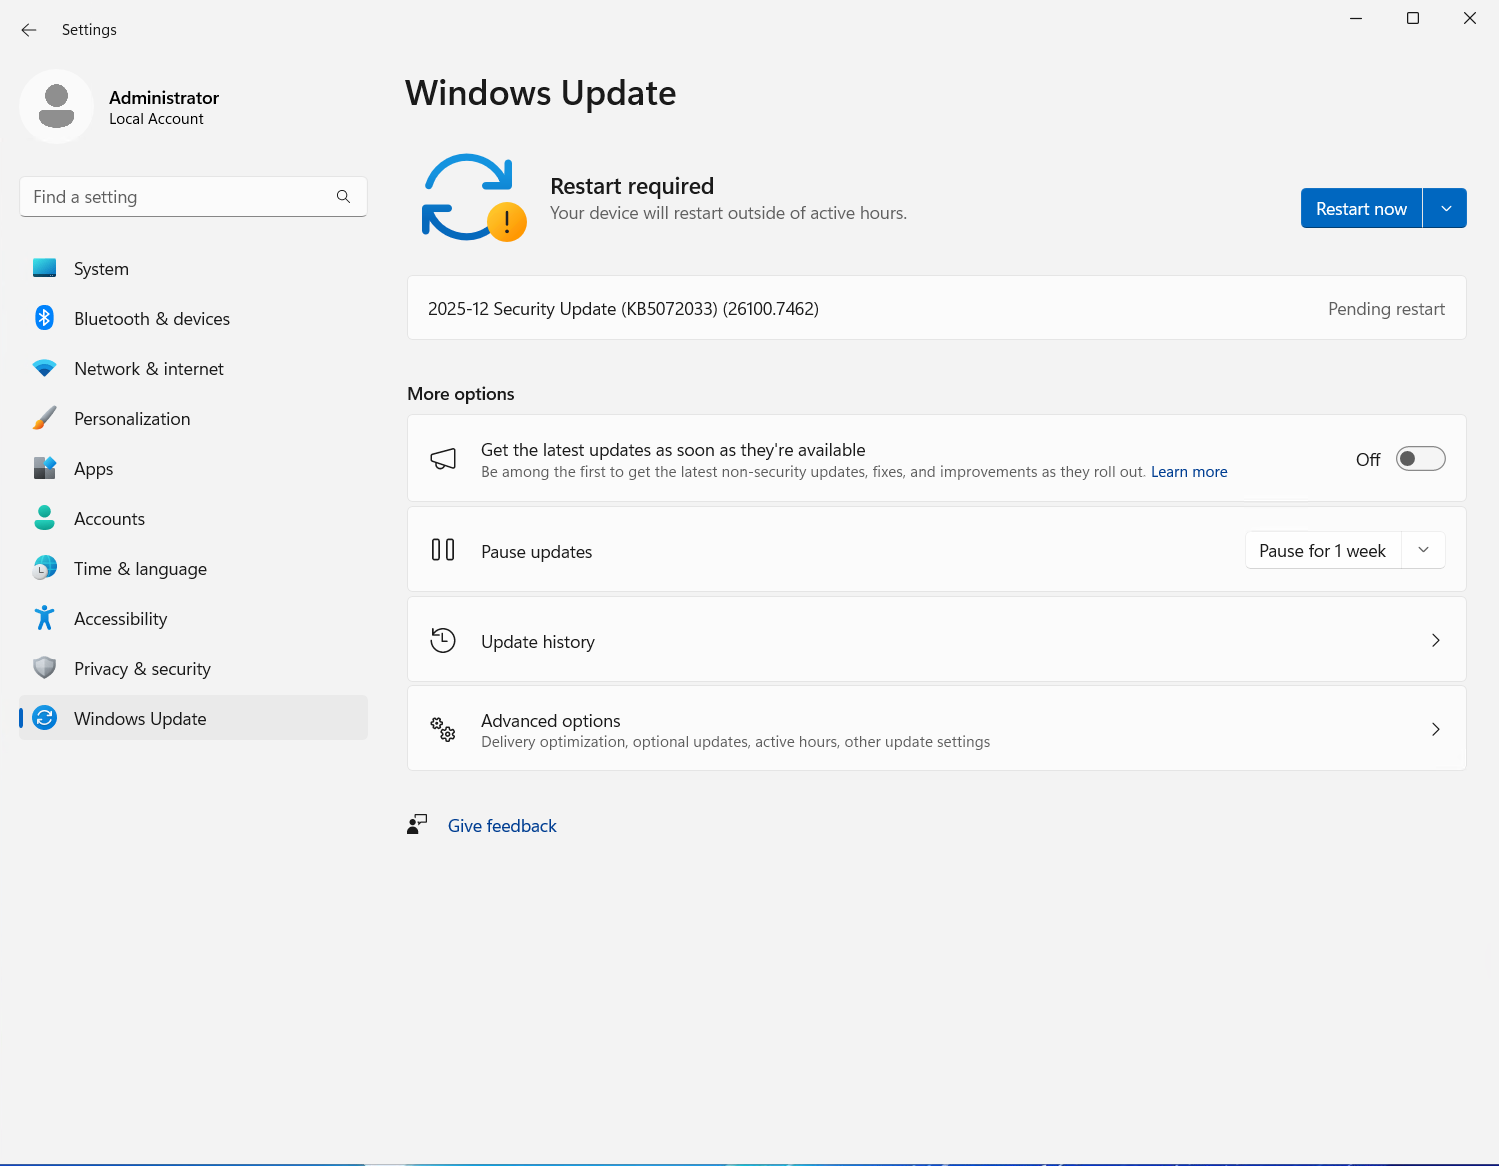
If you see “Restart required”, click Restart now.
⚠️ Updates and restarts may be required in multiple rounds.
3. Configure time zone and time server
Important: The time server must always be set to time.vipy.hu, because only this server is allowed.
3.1 Set the time zone
1. Open: Settings
2. Go to: Time & language
3. Select: Date & time
4. Set the time zone:
- Time zone: (UTC+01:00) Budapest
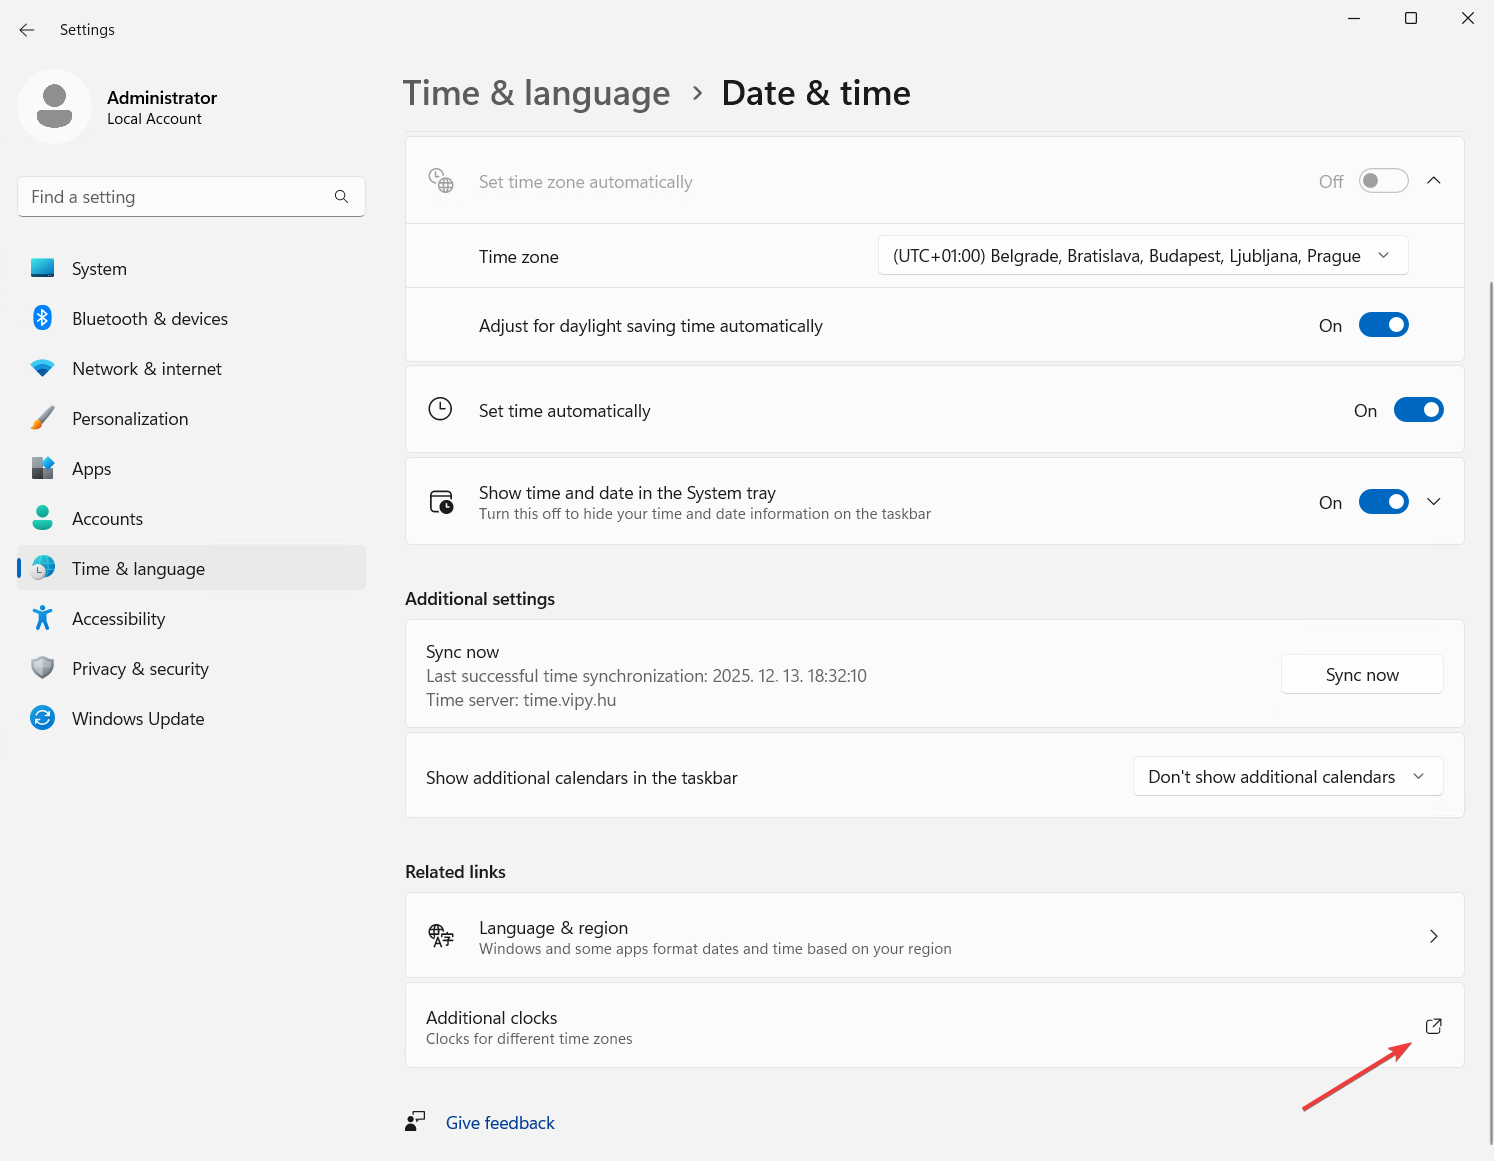
Set the Time zone here (e.g. (UTC+01:00) Budapest).
3.2 Set the time server: `time.vipy.hu`
Important: The time server must always be time.vipy.hu, because only this server is allowed.
Option A (from Settings):
1. Open: Settings
2. Go to: Time & language
3. Select: Date & time
4. Click: Additional clocks
5. Open: Internet Time
6. Click: Change settings…
7. Enable:
- Synchronize with an Internet time server
8. In the server field, enter: time.vipy.hu
9. Click: Update now
10. Finally: OK
Option B (classic path):
- Control Panel → Date and Time → Internet Time → Change settings…
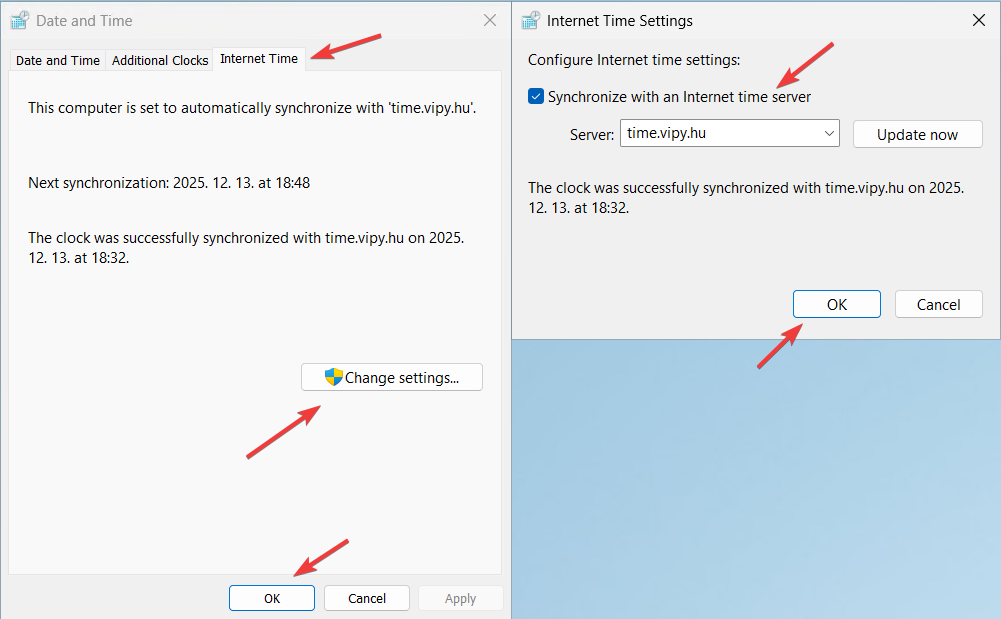
Enable Synchronize with an Internet time server, then set Server: time.vipy.hu → Update now.
ℹ️ Important: The time server must always be set to `time.vipy.hu`, because only this server is allowed.
Linux VPS – password change and basic setup
1. Change password (recommended immediately)
After logging in via SSH, run:
passwd
2. Update the system (recommended)
On Debian/Ubuntu:
apt update
apt upgrade -y
If needed, reboot:
reboot
3. Configure time zone and time server
Linux VPS instances use chrony for time synchronization, and only the time.vipy.hu time server is allowed.
3.1 Set the time zone
timedatectl set-timezone Europe/Budapest
Check:
timedatectl
3.2 Configure chrony: `time.vipy.hu`
1. Open the chrony configuration:
nano /etc/chrony/chrony.conf
2. Find the existing pool or server lines and set it like this (example):
pool time.vipy.hu iburst
ℹ️ It is recommended to remove or comment out other `pool` / `server` lines so that only **time.vipy.hu** remains.
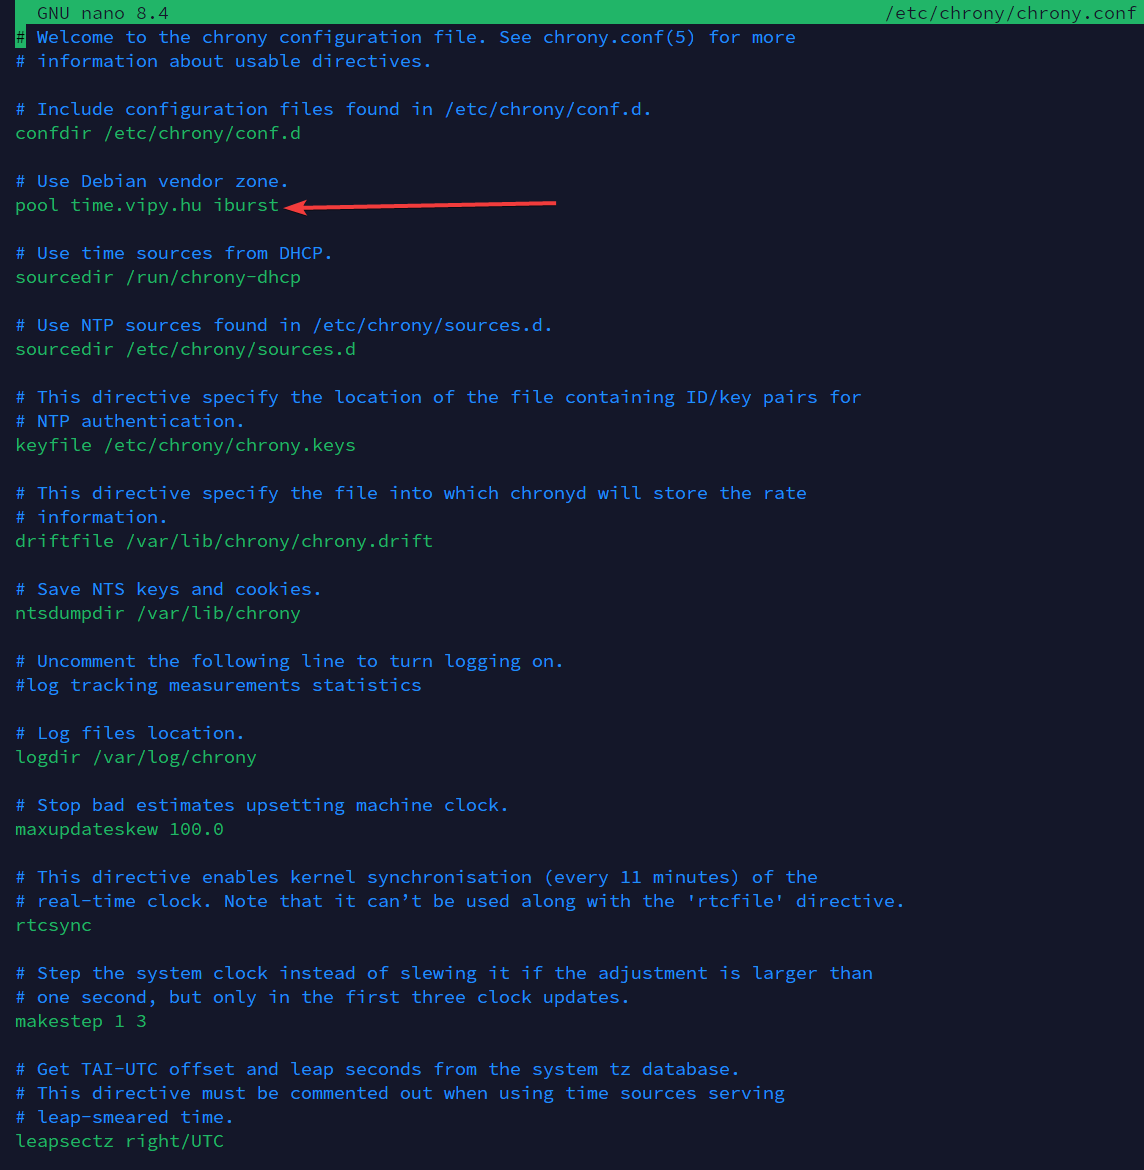
Example configuration for the `time.vipy.hu` time server.
3. After saving, restart chrony:
systemctl restart chrony
ℹ️ Important: The time server must always be set to `time.vipy.hu`, because only this server is allowed.